I started a new quilt on Friday night. It's one I've been designing in my head and on paper for a while, and I finally made a decision on how to achieve it. Unfortunately it requires me to draft a full-size pattern to work from.
It's 1.7 x 2m, and the background is pieced from curved shapes - 125 of them as it turns out. I started by taping together large sheets of paper to get a piece big enough, then drafted the shapes in pencil. Then I drew over them in a black marker, numbered all the pieces, added registration marks on all seams, and photographed the whole thing in sections for future reference.
Then I had to cut them apart. The cut shapes are the final design, and it doesn't matter if they're not perfectly along the lines, as long as the curves are smooth.
Then I pushed the pieces back together into position, and started selecting fabrics. Note the supervisor on the sofa; it was probably about 2am by this point, but I couldn't leave it like this, so kept going - luckily Simon had taken James and Eleanor away for the weekend, so there was nothing to get me up on Saturday morning!
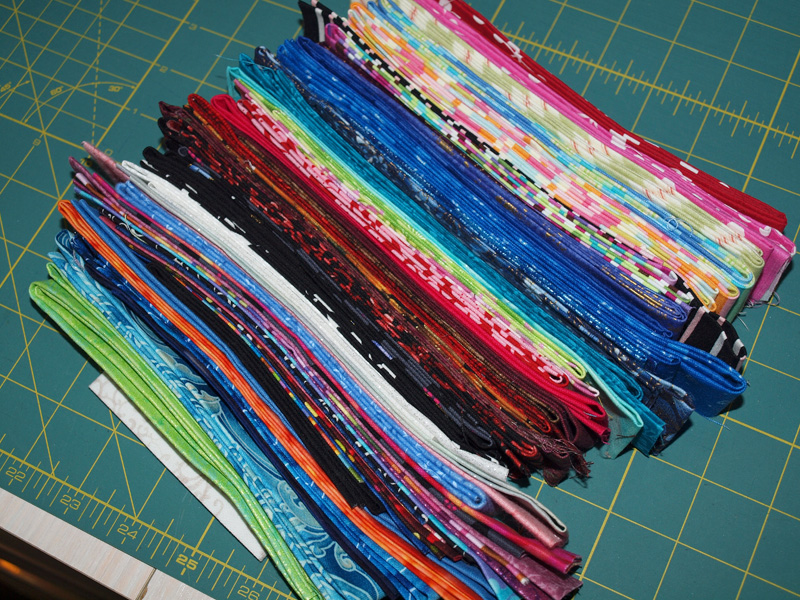
I used a funny assortment of household items (different coloured straws, cutlery, plastic cups, coins, even balls of yarn!) to represent the different fabrics, as I chose which pieces would be cut from which prints:
(Note the other supervisor on my folded quilt - I kept blocking access to his basket under the table shoved to the side, so put out the quilt as a replacement; arthritis stops him from jumping onto the sofas.) I finally got to bed at about 4.30.
Then came the slow task of pinning each pattern piece to the selected fabric, drawing around it with a contrast marker, adding the 1/4in seam allowance as I went. I also marked the registration marks in the same black and white permanent markers (all in the seam allowance or on the cutting line, so none will show in the finished quilt). Oh, and cutting them out. I keep them pinned to their pattern piece until I use them, at which stage I also write the piece number in the seam allowance. More on these next steps tomorrow...
Monday, 13 May 2013
Saturday, 4 May 2013
Foundation piecing
Although as far as I'm concerned, the advantages far outweigh the disadvantages, removing the papers is definitely the downside of foundation piecing. However, it's made far better when you have a 5-year-old assistant who just wants to hold the bowl (for all the paper scraps) in exactly the right place for you, and have a cute conversation. Thank you Eleanor!
It certainly made the process much more enjoyable, and got I all the blocks done this afternoon. One of my favourites is above. This evening I've joined all the block, added the first border, and am no auditioning the main border. I couldn't find a batik matching what I had in mind anywhere, but have found a print (from my stash - even better!) which gives the right effect. It's just not quite the colour I'd intended, so I'm not rushing into a choice.
Tuesday, 30 April 2013
Red and white quilt
I've been making a concerted effort recently to get my digital photos properly sorted. Although most people would probably consider them already in pretty good order, it's one thing I'm really fussy about. I go through and weed out all but the best, then I edit them as necessary. I rename them all, sort them into the right folders, and make sure they're backed-up - preferably twice and in different locations ( I keep a second external hard-drive at my parents' house, though I don't update it quite as often as I should).
At the same time, I've caught up on photographing a few quilts, so I have some ready to share -although a few must wait until they're published. Today's quilt is made from simple equilateral triangles, and is called Dziękuję - which means 'thank you' in Polish.
I quilted it using the all-over swirls which I like so much at the moment. I was a bit unsure about an all-over design with such stark contrast to the fabrics, but the red BottomLine is fine enough that it doesn't look out of place on the lighter fabrics, and of course it blends well on the red. I especially like the way the quilting shows on the plain ombre border.
It measures close to 50 x 60in - a nice size for a lap quilt, and joins a large pile of quilts waiting to be given as gifts (I just need to make one more, then can take them to their intended recipients).
Monday, 29 April 2013
From the stash
The new quilt I'm working on requires 67 different fabrics. I managed to get 60 from my stash, which I thought was pretty good going. I filled all but one of the gaps at one of my LQSs this afternoon, and the only one I still need is a feature print for the main border, but I can't find anything close to what I used in my EQ7 design. So I've decided to piece the rest, them play around with some options for the border later on.
I started the piecing tonight, but there's a way to go before it starts looking like anything.
Sunday, 21 April 2013
My new long-arm...
...only cost $40.
Sadly, it's only a long-arm stapler! But it did make collating the recent new print-runs of my patterns much easier. (The tree pattern is A4 sheets folded in half and (now) stapled at the fold, which a normal stapler just can't reach.)
Both Winter Harvest (above) and the Beach Scene (below) quilt patterns are now back in stock in my Etsy store.
Etsy has also introduced a simpler method of delivering digital patterns. After purchasing the PDF version of my Beach Scene the buyer will receive an email from Etsy, advising them their files are ready to download instantly, with a link to where the file is stored with Etsy. However, their system cannot yet manage this for the package deal, so those purchasing both the digital and hard copy together will still receive the files directly emailed from me.
Friday, 19 April 2013
Beach with borders
I finally got myself into gear and finished the beach quilt top. It's pretty big (66 x 81in) so for the quick photo I draped it over one of the sofas and onto the freshly-cleaned floor.
I really like the way the border turned out. I'll sandwich and start quilting tomorrow. I usually bind my beach quilts in a bright stripe, but I think this one might be better with plain navy - or I do have a white, navy and mid-blue diagonal stripe which I'll audition as well once the quilting is done.
A week on from her accident, and Eleanor's recovering nicely; we have a follow-up appointment tomorrow just to be sure.
Sunday, 14 April 2013
Not quilty
Our school holidays started early and in dramatic fashion. James and Eleanor's school had a student-free day on Friday before the official 2-week break starts, but our quiet day didn't go as planned. I'd hoped to do some quilting.
At 11.30 Eleanor had a silly accident tumbling over the arm of the sofa and bumping her mouth on the coffee table. It was quickly obvious she'd knocked one of her top teeth loose, and by 12.45 we were at the children's dentist, with the surgeon who'd removed James' teeth after a similar (but more dramtic) incident at almost exactly the same age. It turned out, she'd badly loosened her centre-left top tooth, and the one next to it, and they didn't want to wait to deal with it. They also decided that since, also like James, as her front 2 adult teeth are coming through at the bottom and the baby teeth weren't at all wobbly (they obviously share genes for long roots) they may as well take them out at the same, to make room for the adult teeth. This takes copying one's older brother to a whole new level!
So by 2.45 we were at the SurgiCentre and not long after I took her through to the operating theatre and held her in my arms as they administered the gas, then went and read for a while. She was out within half an hour, and the dentist came along with the teeth in a pouch for the tooth fairy to tell me it had all gone well. She even got to keep her little teddy by her side from start to finish. Not long later she started to stir, and spent the next hour or so snuggling on my lap on a very comfy recliner and having a few licks of an ice block while I was plied with food and drink when the nurses realised I'd somehow not had a chance to eat all day!
By about 8pm she was quite cheery and managed some home-made custard before going to bed and sleeping all night (though I did wake her when I went to bed and top her up with some panadol). She was a bit quieter than usual most of Saturday, but is pretty much back to her usual self.
I'm sad to see the last of her cute mouthful of little baby teeth, but very thankful at the same time that they were only baby teeth. She'll be gappy at the top for a while to come, but we expect no ongoing issues, and the new bottom teeth should fill the space there quite quickly. While it obviously wasn't a nice (or cheap!) way to spend the day, especially for Eleanor, it was remarkably easy, all things considered. Once again, I can't speak highly enough of the dental staff, surgeon and SurgiCentre staff fro the way they handled everything. To be home, fully treated, so soon after the accident is wonderful. I'm also grateful to my parents, who looked after James at such short notice (and even took him to an appointment I'd expected he'd have to miss) since I couldn't get hold of Simon at work until minutes before the surgery.
(The 'before' photos were taken during their Easter egg hunt - as an aside, you can see James' gum was damaged in his accident, leaving more of his upper left centre tooth showing, but with no ongoing trouble)
At 11.30 Eleanor had a silly accident tumbling over the arm of the sofa and bumping her mouth on the coffee table. It was quickly obvious she'd knocked one of her top teeth loose, and by 12.45 we were at the children's dentist, with the surgeon who'd removed James' teeth after a similar (but more dramtic) incident at almost exactly the same age. It turned out, she'd badly loosened her centre-left top tooth, and the one next to it, and they didn't want to wait to deal with it. They also decided that since, also like James, as her front 2 adult teeth are coming through at the bottom and the baby teeth weren't at all wobbly (they obviously share genes for long roots) they may as well take them out at the same, to make room for the adult teeth. This takes copying one's older brother to a whole new level!
So by 2.45 we were at the SurgiCentre and not long after I took her through to the operating theatre and held her in my arms as they administered the gas, then went and read for a while. She was out within half an hour, and the dentist came along with the teeth in a pouch for the tooth fairy to tell me it had all gone well. She even got to keep her little teddy by her side from start to finish. Not long later she started to stir, and spent the next hour or so snuggling on my lap on a very comfy recliner and having a few licks of an ice block while I was plied with food and drink when the nurses realised I'd somehow not had a chance to eat all day!
By about 8pm she was quite cheery and managed some home-made custard before going to bed and sleeping all night (though I did wake her when I went to bed and top her up with some panadol). She was a bit quieter than usual most of Saturday, but is pretty much back to her usual self.
(less than 10 hours after the accident; giggling at her new toy whispering in her ear)
I'm sad to see the last of her cute mouthful of little baby teeth, but very thankful at the same time that they were only baby teeth. She'll be gappy at the top for a while to come, but we expect no ongoing issues, and the new bottom teeth should fill the space there quite quickly. While it obviously wasn't a nice (or cheap!) way to spend the day, especially for Eleanor, it was remarkably easy, all things considered. Once again, I can't speak highly enough of the dental staff, surgeon and SurgiCentre staff fro the way they handled everything. To be home, fully treated, so soon after the accident is wonderful. I'm also grateful to my parents, who looked after James at such short notice (and even took him to an appointment I'd expected he'd have to miss) since I couldn't get hold of Simon at work until minutes before the surgery.
(The 'before' photos were taken during their Easter egg hunt - as an aside, you can see James' gum was damaged in his accident, leaving more of his upper left centre tooth showing, but with no ongoing trouble)
Tuesday, 9 April 2013
Another beach
Sorry, I didn't mean to vanish for a few weeks! I've been plodding along, quilting a bit and procrastinating a lot (especially when it comes to blogging!) I've started on a commissioned beach scene.
This one will be single bed size, but to avoid losing half the scene off the foot and sides of the bed, we decided to make the scene as the centre, and I'm doing some coordinating water piecing for the 3-sided border.
I made a good start on this at Easter; I took the equivalent of seven full shopping bags worth of fabric with me - I need plenty to choose from as I piece these. As it turned out, I only got the reef/water section done (shown above with all the fabrics cut and pinned in place, but none sewn), so could have left the stacks of sand and sky fabrics at home - but I chose not to mention that to Simon!
In the last week I've pieced the sky and beach. I've added quite a few fabrics to my beach scene stash recently (I'm always on the look-out) and this time have added a kite to the sky. I've got some hot air balloons on the way now, too, so might incorporate one of those into the next one. I still find the beach the hardest to choose the fabrics for. Although it gets easier and I'm more confident in my choices, I do still occasionally look back on something after it's cut and pinned into position on the foundation and realise it contrasts too much with a neighbouring piece and needs replacing.
Sunday, 24 March 2013
Change of plan
An email late last week suddenly changed my quilty plans for the weekend. This pile came out of the cupboard on Friday night and got cut:
Simon took both James and Eleanor sailing on Saturday, so I got stuck in. I laid out all my pieces, and was just pressing the final seam when they got home.
I did most of the quilting last night, using a flower variation on my open feathers I worked out recently.
It's just one open feather plume to each side, then a swirl up from the centre, and 4-6 half-circle petals around the top of the swirl. Then repeat. It fills the quilt nicely, and I just threw in a few extra plumes here and there to fill odd spaces or get myself out of a corner.
The working name for this quilt is Garden Paths, and it will be appearing in AP&Q later this year. It's fun and pretty easy and makes a lovely baby's play quilt.
Thursday, 21 March 2013
Binding
This is leftover binding.
There are strips here from over 60 quilts; a few pieces as short as 5in, several closer to a metre and a lot in between. I can't bring myself to waste them - there must be enough here to bind several lap size quilts! But I need the right quilt; I'm not willing to sacrifice the integrity of one of my designs just for the sake of using it up. Maybe I'll have to design a future quilt with scrap binding in mind?
Put a swirl over here...
A few days ago I set out to quilt this red and white lap quilt. It didn't get done during the day because the deep red backing fabric just kept bleeding, through 10 hand rinses and at least 8 cycles through the washing machine. And yes - in hindsight, I should've googled for ways to stop it earlier. But eventually I decided it was close enough, and when I gift it, I'll add a note to use some colour catchers when washing it and be sure to hang it out to dry right away.
I did get it sandwiched and make a start before collecting James and Eleanor from school, but ended up quilting into the wee hours (again!) to get the quilting finished. I chose to use the extended swirls I've been liking (and doodling a lot) recently.
The thread is red BottomLine by Superior, and I used the same top and bottom. I chose a lightweight thread so it didn't stand out too badly on the white-based fabrics, and it has a nice effect. It blended so well on a few of the red fabrics I found it hard to see where I'd already quilted! I like it best on the red ombre border:
I just need to decide on the binding fabric now, and it will be done, too.
Finished at last
Tonight I finally finished this quilt. It feels as though it's ages since I started it, though it was actually only about six weeks ago. But since then, I've quilted 2 customer quilts and one of my own, started and finished the linen wholecloth table runner, started a new applique quilt, worked on about a dozen designs and written a set of instructions.
Now I need to start on the instructions for this one. That's going to take some focus, since I'm much more interested in finishing the current applique and getting stuck into the beach scene commissions.
This quilt is called Mediterranean Tiles and I'll share it in full when it's published in Australian Patchwork & Quilting in the middle of the year.
Tuesday, 19 March 2013
Emerging
This is another quilt that I never got around to blogging once it was finished, although I did show plenty of progress photos. I made Emerging for FLiQS2; an invitation-only quilt swap. I'm currently (and reluctantly) sitting out round 3, because I have so much to do. The two separate commissions for bed-size beach scene quilts I've recently added to my list just confirm that was the right decision.
My basic design concept came from merging several of my partner's likes, although I changed quite a bit of the way I constructed it as I went. I hadn't actually planned for it to be completely wholecloth, but it works better this way.
It took a lot of drawing and re-drawing to get the tree roots just right, but I love the way they turned out, and they really sing quilted in silver holographic thread (Superior Glitter - my favourite for the metallic effect).
The background is dense filelr quilting in gradating colours. I'm originally meant to have several more colours and more rings, but it came down to thread choices, and these were best. It also meant that I could move the outer feather ring further out, beyond the branches. In my sketches, the feathers (unintentionally) went through the tree branches, which would have been a pain to quilt, and not visually effective - the feathers would have been broken and distracted form the branches.
My first sketches also called for filler quilting inside the trees and between the roots, but after quilting the trees, I decided against the fill - it wasn't necessary.
Once the quilt was bound, I felt it was missing something, and quilted a line of charcoal glitter thread in the ditch of the binding, but it didn't really show, so I picked a brighter glitter thread and using a hand sewing needle, I threaded it through the charcoal stitches, going through about every 3rd stitch.
I'd originally planed for the birds to be appliqued, but after the trees were quilted, I wanted them to be the feature, so I quilted the birds, too. I used lighter threads for these than in the rest of the quilt, and quilted around each one twice. I'd probably prefer them slightly darker, and in hindsight wouldn't have chosen yellow for the third one, but they work well.
Oh, and by the way, the red backing fabric took at least 9 wash cycles - luckily I didn't have much other washing to do!
Fortunate problems
I was all set to start the day by sandwiching a lap quilt, hoping that, with a nice all-over pattern, it would be done and ready to bind by the time I collect James and Eleanor from school. But while pressing the backing, I notice it needed washing. I was just wondering if I could get away without, when I remembered being reminded when I bought it that, being a deep red, it should be pre-washed anyway. Since I had a load in the washing machine at the time, I rinsed it several times in the sink. After about 8 rinses (using both hot and cold water) the load of washing was done, and my rinsing water was still red - not just a bit pink, but quite red. It's now on it's second third fourth (and still not final!) cycle in the washing machine. So it turns out, I'm rather lucky it had a dirty mark!
It's made from a range of Amy Butler fabric of which I got a set of half-metre cuts a while back, with some coordinating solids added.
This was obviously part of my equilateral triangle obsession (so is the red quilt I want to quilt today) and this is another one where it didn't quite turn out as effective as I'd hoped. However, it's ok, and it was quick and easy to make, and brings me one step closer to completing what I need, so all in all, I'm happy.
It would have been better with the planned pop of apricot piping inside the binding, but as I began to attach it, I realised my border quilting pattern went too close to the sides, and the piping would cover the edge of it and look odd, so I left it off. Again, some poor planning on my part, but I'll know better next time.
The design plan was to have 'columns' of different colours or with a rainbow effect, but the variety of prints tends to blur that. To help the effect, I quilted the columns in different patterns -although some are repeated. I used open feathers, large pebbles, figure-eights, a spiky fern design and a few others.
I love the variegated feathers in the setting triangles along the two sides.
In the meantime, here's a quilt I completed ages ago, but never shared. It still needs a name.
It's made from a range of Amy Butler fabric of which I got a set of half-metre cuts a while back, with some coordinating solids added.
This was obviously part of my equilateral triangle obsession (so is the red quilt I want to quilt today) and this is another one where it didn't quite turn out as effective as I'd hoped. However, it's ok, and it was quick and easy to make, and brings me one step closer to completing what I need, so all in all, I'm happy.
It would have been better with the planned pop of apricot piping inside the binding, but as I began to attach it, I realised my border quilting pattern went too close to the sides, and the piping would cover the edge of it and look odd, so I left it off. Again, some poor planning on my part, but I'll know better next time.
I love the variegated feathers in the setting triangles along the two sides.
Monday, 18 March 2013
Bursts of Illusion
My quilt Bursts of Illusion is in the current issue of Australian Patchwork and Quilting (Vol 22 No 5).
It looks as though it's a New York Beauty block, but I've redesigned it. My version of the block is called Echidna, and has no curved seams!
I really like the way the block orientation makes them look out of shape.
It even makes the perfectly straight edges of the quilt look wavy!
I made my quilt with a tone-on-tone white background, and spikes from a selection of Paula Nadelstern prints, which are colourful patterns on black backgrounds. In hindsight, I should have omitted a few of the acid citrus colours.
Monday, 11 March 2013
Arcs and curlicues
I never intended to be only a weekly blogger, but that seems about all I'm managing for now. This heat leaves me quite lethargic - how long until summer realises she's over-stayed her welcome? - nearly 2 weeks later and we're still nudging 40!
I don't really have a lot to show for my week; I've been working on instructions (not very exiting or visually appealing!) spent a lot of time refining quilt designs (which I can't share because they're with my editor) and then dithering over fabric selection for my next quilt (peek above). I knew when I designed this one that the curlicues would require a lot of time and effort for something so small, but the effect is definitely worth it. It's the cutting and appliqueing which take the most time; quiltign around them will be much faster, especially if I decide to free-motion that part.
After finishing the Linen and Lace table runner, I have got back into quilting the project I was working on before I interrupted its progress. These arcs are free-motion quilted. I divide the border into sections of equal size, then find a suitable glass or bowl to draw around to give the effect I want, connecting the small marks I've made to delineate the sections.
In this case I decided my sections would work well matching up with the blocks making the next border, so used the seamlines instead of marking. I did, however, mark about 1cm either side of the seams, to guide marking the echoing arcs, and the mid-way points to mark in the alternate set of arcs.
Saturday, 2 March 2013
Enough lace
Oops! I didn't mean to go all week without blogging; I've been quilting the lace on the table runner. Last night I finished and bound it, and I'm relieved it's done.
The photo above is the same piece as the last one I showed, but this time from the front and almost complete.
I wasn't entirely sold on the the darker threads, so only used them a couple of times in the largest doilies, then set them aside. Above (back) and below (front detail) are one of the middle-sized doilies. I really like the swirl effect in the centre of this one; it just evolved as I started quilting - I had no pre-conceived vision of how it would look when done.
The finished table runner is 14 x 40in, and there are 99,000 stitches in it!
As before, it's all hand-guided, free-motion quilting.
I'm linking up with Leah's FMQ Friday.
Subscribe to:
Posts (Atom)


