Saturday 26 October 2013

Strawberry Mousse - Blogger's Quilt Festival

I've only just finished Strawberry Mousse, and the pattern for it will be out in Australian Patchwork & Quilting (v23 n7) come March. I don't usually show quilts before they're published, but I couldn't resist sharing this one now.


I designed it last summer, after a morning of strawberry picking with James and Eleanor - although the design did evolve as I made it. The name comes from a simple family recipe, which is excellent  when you pick far too many strawberries and the last of them start to soften a little.


It's all done with fused applique (and a little thread-painting) and the stems are all straight strips cut on the bias and gently eased to form the curves.


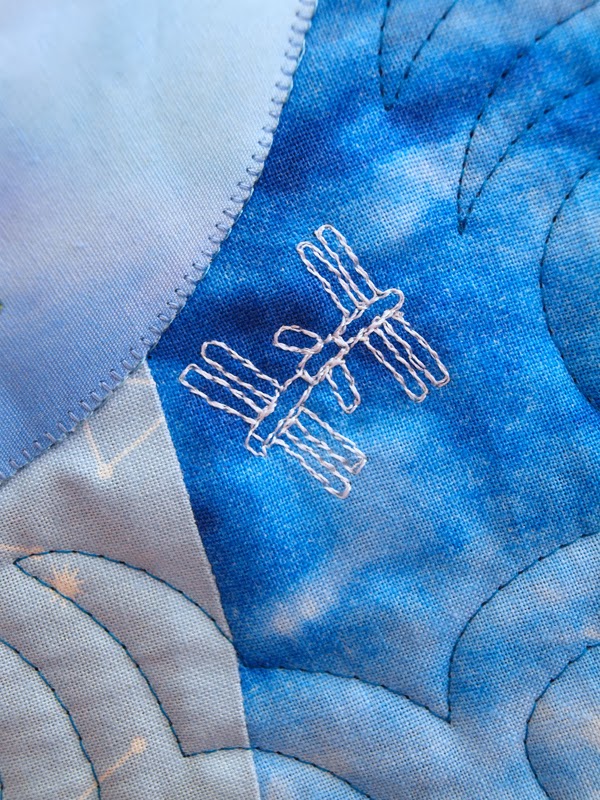
It's 39in square - designed to fit conveniently on standard-width fabric. The background fabric I used was rather more creamy than pink, but by quilting all the feathers in pale pink Aurifil, I've boosted the pink to make it look more like the mousse. The feathers were inspired by Wendy of Ivory Spring, and I love the way they came out. They were actually fairly quick to quilt, too.


The applique is done in free-motion, stitching twice around the very edge of each shape twice, and is done after sandwiching, so it's the quilting as well.

(before quilting)

I love all the little curlicues on the side sections, even if they're not true to strawberry plants.


I did work hard to make the blossoms realistic though, using thread to quilt/draw the pale green representing the calyx visible between the petals, then going over that in the centre with yellow threads. These additions also help to make the white flowers stand out better - they also show up better in person.


The pots in the corners conveniently came out of a small scrap of a print from Kate Spain's Central Park. I rarely use my scrap box, since only the smallest of pieces go in there, but I recently had to upgrade to a larger tub, so it was nice to get both the pots and the flowers from there.


Some of my recent posts explain a bit more of the process - and if you want to make your own; keep an eye out for AP&Q from March next year.

Thank you for visiting my Bloggers' Quilt Festival applique quilt entry; I hope you'll be back! If you haven't already, enjoy the others, here.


Frozen Strawberry Mousse:

1 lb fresh strawberries (it's ok if they're starting to soften - you can often buy cheaper 'jam' strawberries which are fine, too) 
1 cup caster sugar
Extra quarter cup caster sugar
1 cup thickened cream, whipped
Juice of half a lemon
2 large egg whites

Mash the strawberries – don’t overdo it (a potato hand masher is perfect but slow; if using a stabmix, use very short pulses - you don't want puree). Add the sugar and lemon juice and stir until the sugar is dissolved. Whip egg whites stiffly and gradually add the extra sugar. Carefully fold together the strawberries, egg whites and whipped cream and pour into a wet quart mould/pudding basin). Cover and place in freezer. Allow about 12h to freeze.

Friday 25 October 2013

Volare - Bloggers' Quilt Festival

Thank you for visiting my Bloggers' Quilt Festival entry!

I made Volare earlier this year as a commission for a friend's son.


It's a generous single (twin) bed size, and the background is made from about 130 curved, free-form shapes (up to about 18in long) which I drew by hand full-size, then cut up to use as pattern pieces - all carefully numbered. Below is a photo part-way through cutting the pieces on our sitting room floor:


I hand-painted all the planet fabrics. They're appliqued to the background, with an extra layer of batting underneath them - the trapunto gives them some fullness and dimension.


Then I had fun adding lots of detail, by applique, thread-sketching, and in the quilting.


I also found some great space fabrics, which I used for the astronaut on an EVA near Saturn and the space shuttle approaching Mars. While I initially positioned the planets in correct order from the Sun, Saturn moved closer through design influences. And with the exception of Earth which is extra-large (diameter 7in) to show detail, their sizes are also in order - if not to scale. Call it artistic license!


I'm not sure what my favourite detail is; the visitors on Mars, the International Space Station (below), Halley's Comet (between Saturn and Uranus), the tiny plane (look north-east of Earth), or the Southern Cross (bottom).


There's more information and photos on the main post about the quilt here, and there are a number of progress posts, too (in order: 1, 2, 3, 4, 5, 6, 7, 8).


Thanks again for visiting, I  hope you'll be back.

In the meantime, do go and check out all the other BQF entries!

Saturday 19 October 2013

Too early?

I'm not usually one for getting into Christmas early. I might pick up the odd present through the year, but usually I refuse to seriously consider it until after James' birthday, which is exactly 2 months out. But when working with magazine deadlines, that changes! Australian Patchwork & Quilting's Christmas issue (Vol 23 No 1) is out now, which means you still have time to make your own version of my Christmas tree in time for the big day!


My Christmas version of my seasonal tree is called Maligayang Pasko. It means simply 'Merry Christmas' in Tagalog, the main language of the Philippines. My family lived in the capital, Manila, for 3 years when I was a child in the late 80s and early 90s - and it was there we were first introduced to the idea of decorating gardens, homes, trees and public buildings with thousands upon thousands of fairy lights. While the idea is gaining popularity in Australia, it simply doesn't compare with what we experienced in Manila - where undecorated houses were a rare exception, rather than the other way around. I remember walking around the streets near our home, or being driven around the commercial centres, and being amazed by the quantity and creativity of the lights each Christmastime.


To enable the strings of fairly lights to be held in the tree, I manipulated the layout a little and redesigned all the branches to end in little curlicue 'hooks'. This also has the pleasing result of giving the tree an entirely different feel. Then I set the whole thing on a dark background and added a few hundred Swarovski hot-fix crystals.


It's hard to photograph the crystals well, but they sparkle beautifully. I had originally planned to first quilt the string for the lights, but in the end decided it would detract from the crystals. While technically incorrect, it is probably more visually accurate!


I also added a few most Christmassy details; a star on the (now carefully centred) top branch, the all-important presents piled around the base, and a little quilted stocking hanging from one of the lower branches, which is probably my favourite part:


It took me ages to decide on colours for the presents. I used some scraps of a beautiful batik backing and the leftover ends from binding another quilt which matches the binding on this one, which worked out rather conveniently!


The ribbons and bows were made from some stiff, non-fray ribbon I happened to have lying around, and were quick to add by machine.


I'd intended to quilt some holly leaves and berries into the background, but forgot while I was doing it - and in all honesty, they wouldn't have shown up much on the black and charcoal anyway.


The quilt is bound with a very glittery damask print which leaves bits of glitter everywhere

And as always - if you do make your own version, please remember to share a photo!

Lots of little feathers

I've been busily filling the background of the quilt with little feathers - the longest wouldn't be much more than about 3in, most are around 1 1/2 - 2in, and some are as tiny as 3/8in. The overall effect is better than I could have hoped - it was definitely the right choice and actually pretty quick, too (although that's partly because the quilt is only about39in square).


I've been marking guidelines for each plume of feathers - a rough spine and then the boundary for where the feather tips will reach. It's been working quite well and giving my nice, relatively even, shapes.


I've also been marking a curve inside the tighter curves to help me position and shape the shorter feathers smoothly, as this is one area I tend to struggle. This has been really effective, and I'm much happier with the feathers on the inside curves; they're a much better shape than usual and flow nicely.


There are only a couple more plumes to go, then some smaller spaces I need to tuck some feathers into as well. The pink thread is working really nicely to make the background a bit pinker, too.

Friday 18 October 2013

Simple realism

After looking at photos of the flowers for this quilt, I realised the five petals tend to have a small gap between them, with the calyx/sepals visible and extending beyond the sides of the petals.


I decided the simplest way to achieve this would be by appliqueing the five petals as a single piece, then thread-painting using a pale green thread. This goes from the centre of the flower, out almost to the dip between petals, then two narrow, pointy ovals overlapping the edge of the petal applique, straight back to the centre, then repeating for the remaining four 'gaps'. Then right over that I thread-painted the dense stamens with my needle threaded with two yellow threads - this filled the space faster and more thoroughly, as well as giving it added depth by combining two shades of yellow (one a more lemony Aurifil 50 wt cotton and the other a richer, glossy Glide trilobal poly).

This solution was quick and fun and highly effective, giving the otherwise shy blossoms both a pop of colour and some realism. And if you look closely, you may see a hint of the true flavour of this quilt.

Now the applique and associated thread painting is complete, it's time to fill the background. I'm thinking a mass of small, freeform feathers (in the style at which Wendy Sheppard is so accomplished) in pale pink to accentuate the colours of the background fabric.

Thursday 17 October 2013

85 fiddly leaf appliques

Yes, 85 of them. And I swear the fiddly shapes took longer to cut than they did to applique! Twice around each one in free-motion, quilting at the same time.


Oh, and about 300inches of 3/16in wide stems to applique carefully... twice... along both sides....


I enjoyed all the applique except the stems, where any tiny lack of precision shows. And I loved quilting the little curlicue tendrils - I drew them all in first with my air-erasable marker. The rest of the quilt is essentially (but not perfectly) symmetrical, but I chose to add different tendrils as fancy took me. It's still coming along nicely.

Wednesday 16 October 2013

Applique pieces

I've been working on an applique quilt this week. Below was my starting palette:


The fabric were my final choices, including the pale creamy pink batik for the background. The white and the basket-weave both came from my scraps box and the red was from my stash, but the greens and background were bought for this quilt. I have loads of greens, but most in relatively small quantities. Of the threads shown, I'll end up using 12 - plus another three I'd forgotten to get out to start with.


These strips are all straight pieces, cut on the bias. I started with a large rectangle cut at a 45-degree angle, fused it to Lite Steam-a-seam2, trimmed the edges, then cut the narrow strips with the rotary cutter and ruler. I pulled them into shape as I placed them on the background fabric. This works well for gentle curves - it's economical on the amount of fabric used (though you may need a little more to start with) and a lot faster and easier to cut than lots of odd curved pieces, and it allows you to adjust the curvature as you go. I fused these in several batches; they held reasonably with finger-pressing, but being under tension from the curves as well means they don't hold as well as usual before being permanently fused with the iron. So I positioned and finger-pressed as I went until I noticed any starting to loosen, then used the tip/edge of the iron to hold them more permanently until I steam-pressed the whole lot as usual.


Tuesday 8 October 2013

Feathers, flowers and butterflies

I recently completed this customer's quilt. I filled the background with my open feather/flower combination using a pale pink Glide thread which is beautifully glossy.


Then the 15 large (about 8in square) butterfly panels got light custom treatment.


I used matching threads to follow the zigzag edge of the print, and around the daisies in the corners, then quilted each butterfly with ovals along the body, feathers filling the wings, and of course following the antennae on the fabric, using a variegated pink/green/yellow Rainbows (glossy 40wt trilobal poly Superior) thread.


The colours blended nicely on all the different butterflies.


This photo from the back shows the quilting better:


This one was sent back to Kayscha today by James and Eleanor, who proudly went into the post office unaccompanied to lodge it over the counter.

Tuesday 1 October 2013

Hiding in the Sycamore

Here at last are the photos of my latest tree quilt. I've named it Hiding in the Sycamore, even though the things most hidden are the actual sycamore leaves.


My customer had a few specific requests for this quilt for her imminent grandson and we worked together to turn her ideas into a finished design.


I chose the background colour because the nursery has been painted a pale sage green, and the quilted sycamore leaves are a nod to the sycamore branches her daughter stencilled onto the walls - can you find all six of them?


The otherwise autumnal colours were chosen to reflect her daughter's favourite season and the fact that the baby is due in the northern autumn. I found the perfect striped binding after she mentioned the possible inclusion of deep, musky purples and based my initial leaf palette on that, then added in a few brighter tones for contrast.


In the tree sit a pair of Eastern Bluebirds. These are endemic to her local area. The two appliqued birds, cut from single pieces of a convenient rose print in my stash are representative of the parents, while the third bird quilted in a paler blue symbolises their unborn child and at the same time the species' rise from endangered status.


I feel I need to add a short explanation here. Australian possums are cute and are completely unrelated to those found in North America - which are actually opossums. We live in a suburban area in the Adelaide hills and see them frequently in our trees in the evenings - and hear them nightly.

I don't think the possum has any particular significance, but she liked the one I did on an earlier quilt, inspired by Possum Magic. It can be hard to duplicate things like this, but I think I was reasonably successful. It helped enormously that I still had the drawings and the trial pieces of applique from last time to remind me of the thread combinations.


The appliqued moon, which gets its glow from the iridescent pearl white fairy frost fabric, goes with the quote quilted across the top of the tree. It reads 'I see the moon and the moon sees me' and comes from a lullaby sung by several generations of her family.


I knew from past experience that the words would need to be quilting in darker (higher contrast) thread than I'd really expect or want, which makes it a bit daunting to start, but it's come out perfectly.

I marked both the script and the sycamore leaves in a rather convoluted manner, so I could use my preferred marker - an air-erasable purple pen from Sewline.  It's the one pen I am confident comes out completely (and without fuss!) - plus it's easy to mark with and easy to see. But because it fades quite quickly, I didn't want to mark the quilt before sandwiching. So I sandwiched as usual, but didn't quilt around the edges first. I quilted around the tree, then carefully slid the patterns in between the top and batting to their planned (marked with pins) locations, and placed the whole lot over my lightbox. This only worked because my three layers were all pale, because the patterns were heavy, clear lines, and because they were all reasonably close to the edge of the quilt. To get the curve in the writing, I printed it all out, taped it into one line with even spacing, trimmed close above and below the writing, then snipped almost all the way through the paper between the letters, leaving about 1 1/6in uncut at the bottom.


The finished quilt is close to 35 x 45in. The background is filled with my favourite swirls, and I free-motion quilted in the ditch around all the applique. This step is essential to define the shapes, but to try and keep the quilt to budget, this time I chose a neutral thread which enabled me to do all the (attached) leaves at the same time as the tree. It saved quite a bit of time, and makes virtually no difference to the result.

As I did last time, I quilted around the possum in a fine thread to blend with the background, and created an uneven zigzag pattern manually (free-motion) with the regular straight stitch selected. It ends up looking like part of the possum and retains the furry effect which would be lost with a simple line of quilting around it.